Support

5 Support Entries

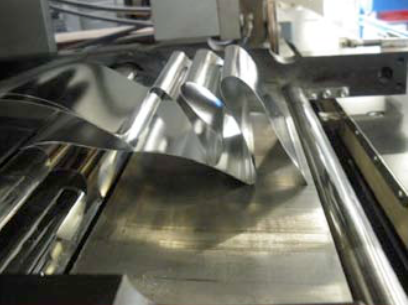
This is the result of a wrong flexer setting!

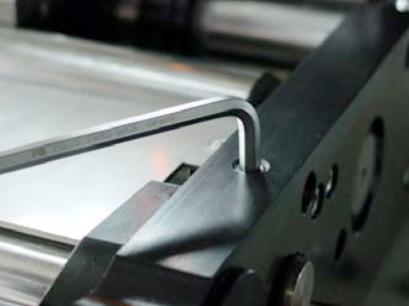
Open the rollformer and you undo the screw on the right handside of the “Flexer”.  

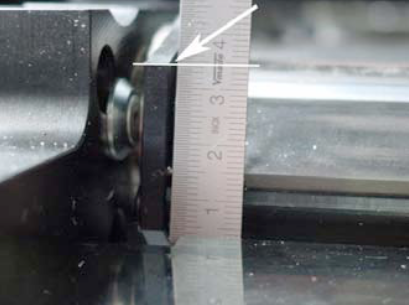
Measure with a ruler the actual position of the flexing wedge.

On the other side of the flexer, you can alter the position of flexer with the M8 screw. Choose a lower position for less flexing.

NOTE:
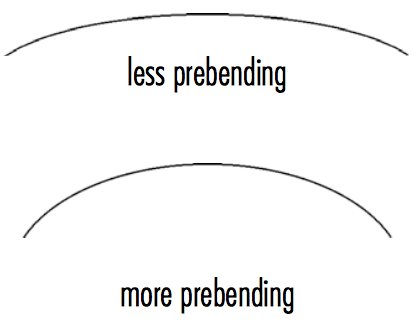
With more flexing the sheet comes out of the flexer station with less prebending.

If you do less flexing, means that the sheet comes out of the flexer station with more prebending.

NOTE:
After adjusting the flexer, you might have to adjust the rounding slighty!
For more information regarding the flexer and rollformer setting check our manual book 2 chapter 5.4.

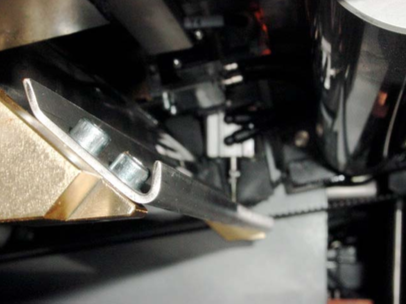
1 or 2 (sender/receiver) sensors are fitted behind the first pair of rollers to recognize double sheets.


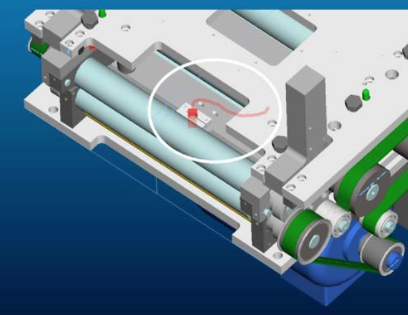
Sensor in the lower part.


A pneumatic cylinder operates the ejection flap.


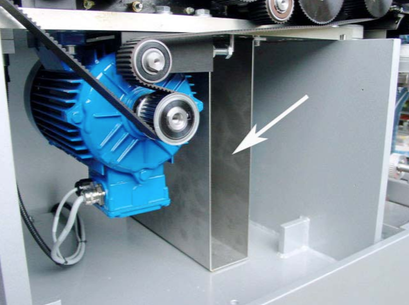
The double sheets detected by the sensor are diverted into this channel by means of a switch point.


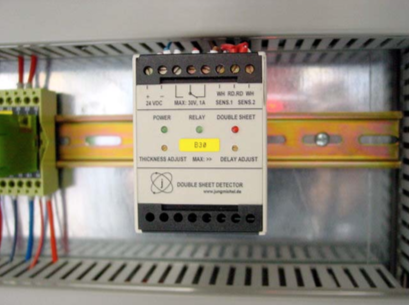
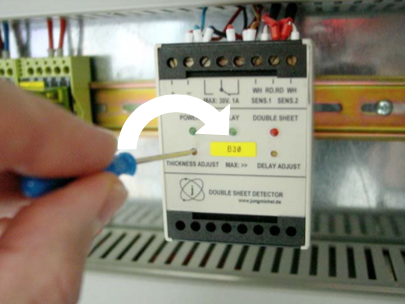
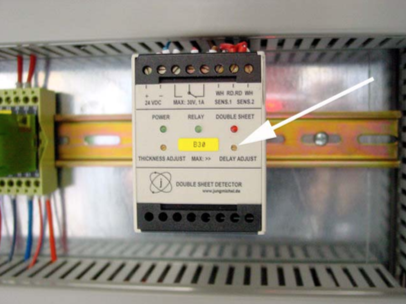
Setting the double sheet sensor
B30

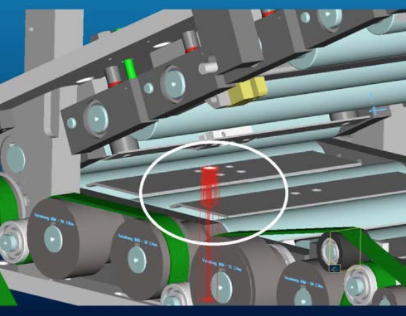
The evaluation unit for the double sheet sensor is located in either the control box (illustration) or in the immediate vicinity of the rollformer, on the feeder side.


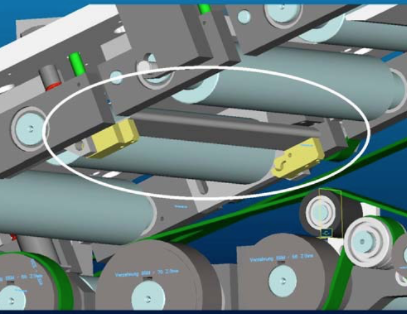
To set the sheet thickness, take a single sheet and lay it on the support rails in front of the first roller pair. You can also open the roll- former and lay a sheet into the rear area by hand. Then close the rollformer again.


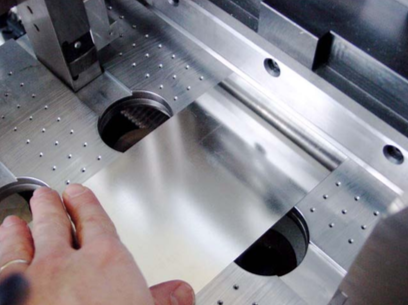
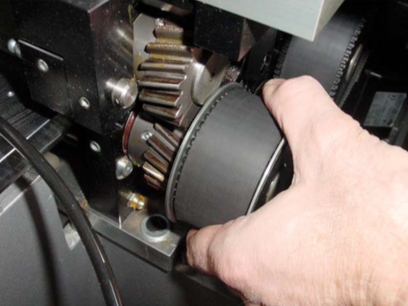
Now turn the single sheet back and forward in the first roller pair by hand with the help of the belt.


The two green LEDs „Power“ and „Relay“ should now be lit up on the evaluation unit.


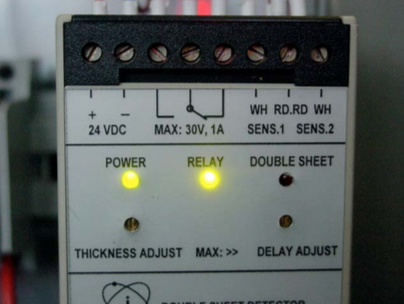
If the red LED „Double sheet“ is lit up, you must carry out a correction.


Turn the left-hand screw „Thickness Adjust“ clockwise until the red LED goes out and the green LED „Relay“ lights up. Add 1-2 additional turns in the clockwise direction.


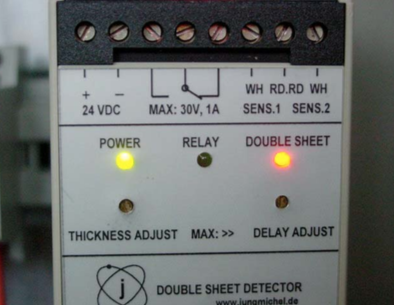
Now carry out the same procedure with two sheets (double sheet).


The red LED „Double sheet“ should now be lit up.


The cylinder should now also be activated. It will be reset again when the sheets are removed.


Do not turn the right-hand screw „Delay adjust“; this is used for the delay of the cylinder stroke.

NOTE:
You will find further details in Book 5 OEM manuals on the CD.

  • Take off the upper rollformer shaft / bending wedge unit completely. Release first both spring pressures completely!
  • Change the bending wedge, take care that the roller is not falling by mistake onto carbide wedge! Put a rag between.
  • Change the support bearings below lower rollformer roller first if damaged!
    • Important: Left and right of both bearings a shim of ø 8/14 x 0.5 mm is needed, to avoid that outside rings of bearings are touching lateraly on the hardened support and becoming hot!
  • Control whether the little shaft (into the needle bearings of lower rollformer shaft) in the right side plate is really fixed well or not.
  • Mount the lower rollformer roller completely, and measure the clearance between roller and bearing: 0.02 – 0.05 mm.
    • Important: If no clearance can be measured, take off the hardened support with bearings, and grind the lower side slighty until above mentioned clearance 0.02 – 0.05 mm has been reached.
  • Mount the upper rollformer shaft / bending wedge unit back (use only bores in the middle!), and move the bending wedge about two turns up. Avoid that the wedge touches the lower shaft after closing the rollformer! Don’t tighten spring pressure yet!
  • Close the rollformer, and hold left and right a feeler gauge 0.10 mm between both rollers. Close the rollformer slowly step by step. Take care that bending wedge will not touch lower roller!
  • Reset the height of upper roller until you can move out both feeler gauges easily. Now open rollformer and measure the clearance between bending wedge and roller. It should min. 0.3 mm.
  • Double check ones more whether a proper clearance between lower roller and bending wedge is there.
  • Close the rollformer completely and reset spring pressure and set roller clearance correctly.
  • Now the rollformer is ready for first rollforming trials.

Possible causes:

  1. Both supporting bearing underneath lower rollformer roller are broken.
    Take off the roller, and check each bearing, if needed exchange them with new ones.
  2. The shaft clearance and/or pressure of the last rollformer roller pair (bending station) is not correct.


How to reset:

  • Open the rollformer completely, close and lock it
  • Check whether the lifting motor has enough play after the rollformer is locked or not.
    • If not, the motor may have a wrong internal micro switch setting.
  • Make sure the rollformer is locked.
  • Completely unload the springs on both sides till each spring has an axial play.
  • To ensure that the roller is easily moving up and down, lift up each end of the roller by hand.
    • Belt tension inside does not effect conical rollforming!
  • Reset roller clearance to 0.1mm by feeler gauge.
    • Check the clearance with two gauges on the very left, and on the very right end of the roller!
  • Turn both springs clockwise till each screw touches the spring.
  • Load each spring by 2.5 revolutions.
  • Reset roller clearance to 0.05 – 0.10 mm
    • Check with two gauges on the very left, as well as the very right end of the shaft. After that you should be able to get a proper rollformed body, with an overlap of 5 mm.

Possible cause:

  1. Take out the bottom gear inside.
  2. Take out both gears outside (motor side).
  3. Adjust the inlet shaft clearance 0.10 mm.
  4. Mount both gears outside again.
  5. Move the upper gear outside laterally, till you feel a play between the teeth of both gears!
  6. Don’t mount the bottom gear inside anymore, you don’t need it!
  7. Lubricate the gears outside with a special gear lubricant (can be ordered from Can Man / article No. 006950).
All Can Man content is now also available on the Soudronic Group website.
Where do you want to continue your journey?
All Can Man content is now also available on the Soudronic Group website.
Where do you want to continue your journey?